Setting up a solar power system at home is a great way to reduce your energy bills and your carbon footprint. This guide will take you through each step of the process, from planning and sizing your system to installation and maintenance.
Overall Summary of the Instructions
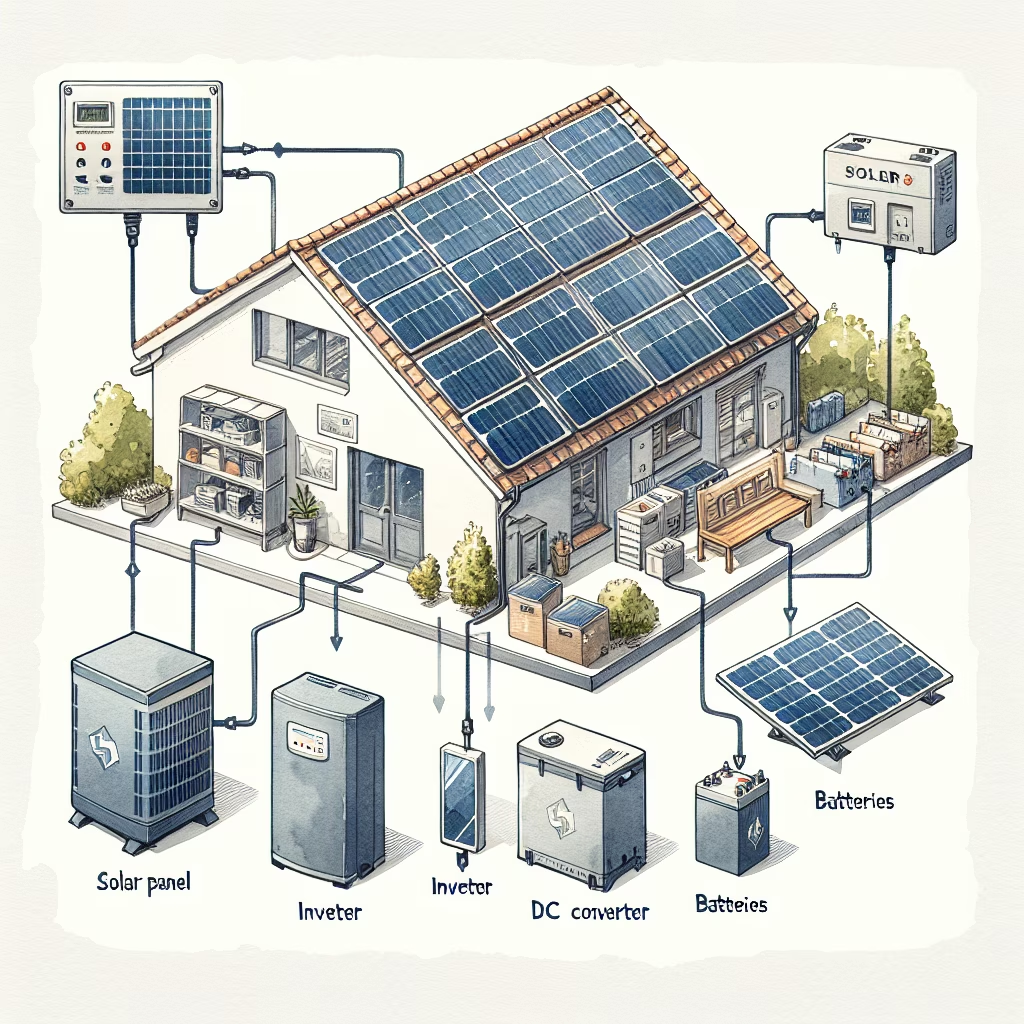
Installing a solar power system involves several key steps: planning and sizing your system, gathering the necessary materials, installing the components (charge controller, inverter, and solar panels), wiring the system, connecting to the grid, and performing maintenance. Each step comes with its own set of requirements and precautions to ensure a safe and efficient setup.
TLDR
Calculate your power load.
Choose your solar panel array.
Gather all necessary materials.
Install the charge controller and inverter.
Mount your solar panels.
Wire your system.
Connect to the grid.
Test your system.
Perform regular maintenance.
Step-by-Step Detailed Guide
1. Calculate Your Power Load
Before you start, you need to determine how much power you need from your solar panel system. This involves calculating the total power consumption of your household.
List all devices and appliances you want to run on solar power.
Check the instruction manuals or product labels to find the wattage required for each device.
Calculate the watt-hours needed by multiplying each device's power rating with its runtime.
Sum up the watt-hours for all devices to get your total power load.
Compare this with your average monthly power consumption, which you can find on your utility bill.
2. Choose Your Solar Panel Array
Next, select the type and number of solar panels you need. Consider the following:
The total power output required.
The space available for installing solar panels.
Your budget.
The efficiency and wattage rating of the panels.
3. Gather Your Materials
Collect all necessary materials for your solar power system:
Solar panels
Inverter
Charge controller (if using batteries)
Batteries (optional for grid-connected systems)
Wiring and mounting hardware
Make sure all components are compatible with each other and suitable for the size of your system.
4. Install the Charge Controller and Inverter
Start by installing the charge controller and inverter:
Connect the positive and negative leads from your solar panels to the input terminals on the charge controller.
Connect the positive and negative leads from your battery bank to the output terminals on the charge controller.
Connect the positive and negative leads from your battery bank to the input terminals on the inverter.
Connect the AC output from the inverter to the main electrical panel or AC load center.
Ensure all connections are secure and have sufficient overcurrent protection.
5. Mount Your Solar Panels
Mount the solar panels on your roof or in a sunny location in your yard:
Follow the manufacturer’s instructions closely.
Securely mount the panels to ensure they are protected from strong winds and storms.
6. Wire Your System
Connect the components as follows:
Connect the solar panels to the charge controller.
Connect the charge controller to the battery bank.
Use properly sized wire, disconnects, and overcurrent protection.
Connect the inverter to the battery bank and the main electrical panel.
Use high-quality wiring rated for solar energy use.
7. Connect to the Grid
For grid-tied systems, follow these steps:
Obtain approval from your local utility company.
Install a bi-directional meter or second production meter.
Hire a licensed electrician to make the electrical connections.
Install a disconnect switch, breaker, and other safety features as per local regulations.
Ensure all permits and guidelines are followed.
8. Test Your System
After installation, test your system to ensure everything is working correctly:
Turn on your solar power system.
Check all connections and components.
Have a professional electrician inspect your work.
9. Maintenance and Troubleshooting
Regular maintenance is essential for the efficient functioning of your solar power system:
Clean your solar panels regularly.
Check for any signs of damage or wear.
Address any problems promptly to prevent more serious damage.